Advanced In-House Direct Mail
How to create your own eye-catching, personalized letters to sellers that appear handwritten
Direct mail is arguably the most popular outbound cold marketing technique, and in the REI world, it works pretty well. A well-funded and consistent mail campaign will yield results. The primary metric by which a mail campaign's success is judged is the 'Response Rate', which in short is how many calls you get after sending your letters, postcards, or other mail.
Our goal for this article is to show you our process for cost effective, high response rate mailers that you can produce at scale. The secret is to put extra care into the appearance of the envelope and letter, so the average responder is convinced that you've written the letter by hand and they're the only one you sent mail to.

(About 950 finished mail pieces)
When we first started, we ordered our mail from a mail house. The response rate was abysmal, and it was expensive. Something needed to change. We started to hand-write envelopes and make photocopies of a handwritten letter (see the bottom of this article for this basic strategy). Not only did we get a much higher response rate, we would get friendly calls from homeowners saying "I received your letter in the mail. I get letters from investors all the time, but I wanted to give you a call because your letter was so personal and thoughtful. Thank you for reaching out." This photocopy-and-handwrite strategy was time consuming, though, and it didn't scale very well. So, we created a solution that gives us an even more convincing handwritten letter look in a more efficient way. We have detailed our process step-by-step here so that you can benefit from it, too!

Cost comparison (Assuming you have printers)
| Cost of materials per 1,000 letters | A popular mail house | Basic Strategy | Advanced Strategy |
|---|---|---|---|
| Envelopes | -- | $125 | $125 |
| Paper | -- | $17 | $17 |
| Ink | -- | $27 | $45 |
| Return address stickers | -- | $0 (handwritten) | $6 |
| Stamps | -- | $550 | $550 |
| Total | $699 | $719 | $743 |
Creating and sending the letters yourself is more expensive, but you'll have control over your final quality and the response rate will skyrocket. Note that in practice, you may want to pay someone to do some of the manual tasks, like applying stamps and return address labels. At the end of the article, we'll discuss outsourcing some tasks to an employee and the costs involved.
What you will need


*This strategy is fairly involved and requires some intial technical setup in order to get a clean looking finished product. If you want a more straightforward technique, there is a brief explanation of the "basic" version at the bottom of this article.
Creating your own font
Most "handwriting fonts" don't fool anyone -- they're clearly typed from a computer. Every "a" looks just like every other "a", as does every "b" and so on. The shapes of the letters need to have variations and imperfections in order to look authentic. We used Calligraphr.com to create a custom handwriting font with up to 15 variations per letter and organic looking typographic ligatures. Follow Calligraphr's prompts to make a font modeled after your own handwriting. Calligraphr allows you to fully control alterations to letter size, spacing between letters, spacing between words, which will tie together as a natural looking handwriting font. You can create a font out of your own handwriting from start to finish for $8.
Writing your letter
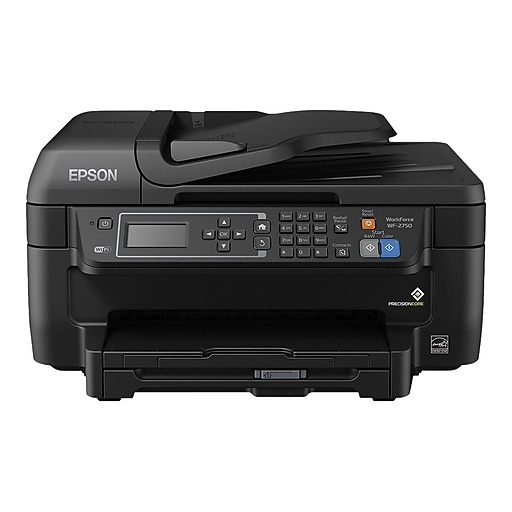
After saving the font to your computer, you can type your letter. As much as we love the Google Suite for our business, Google Docs doesn't support custom fonts. You'll have to use a traditional word processor, like Microsoft Word or Apple's Pages.
You will need to experiment with your font size, line spacing, and margins in order to get the text to print accurately on the lines of your paper. This can take some patience, but once you know the dimensions that fit your font, paper, and printer, it will work for all of your print jobs.

Variable data printing (mail merge)
Variable data printing is what will allow you to autonomously print each letter with the owner's name and the address of interest. You will merge rows from a spreadsheet with these variable fields in your document, so you'll need to have your mailing list ready and the placeholders configured in the document.
Mac instructions
If you're using a Mac, you can use the Pages app for your letter. Type your letter and put "First Name" and "Address" as placeholders where you will want these values to go. Then, highlight your first placeholder and click Format-> Advanced-> Define as Placeholder Text. Do the same for your other placeholders. This will tell the mail merge program where the variables belong on each letter.
Next, you will need to download Pages Data Merge App to your Mac. Click here for the download link and detailed instructions on how to use the program. Note: Step 1 is set to a default setting of Selection of Numbers Table. If your spreadsheet is not in Numbers or if the app is not recognizing your spreadsheet, you can copy the values into your clipboard and select Clipboard in the dropdown menu of Step 1.
After following the instructions from the link above and running the program, you should have a folder on your computer containing individual files of each letter. To print them, all at once, highlight the files, and click File-> Print at the top of the page. Your letters should print in succession onto your yellow paper. Don't forget to tear off the yellow sheets from the pad and load them into the printer tray before hitting print!
Other platforms
As of now, we've only done mail merge with Pages on Mac because that's what we have available. When we learn how to do it with Word, we'll update this article with tips on doing the same thing with Windows.
Envelopes
Your envelope is the most important part of this process. An eye-catching envelope will get opened, which is the whole game here. We handwrite our addresses on colorful A6 invitation envelopes, and use real forever stamps.
Once everything else in the process has been set up, you'll find that hand writing the outside of the envelope is the most time consuming bottleneck of this process. We have an employee who hand-writes the addresses. Finding someone to do this is very easy, it can be as simple as making a Facebook post in your local "buy and sell" group looking for someone interested in making $10-$15 an hour addressing envelopes. High schoolers and college students will jump at the opportunity for a part-time, at-your-own-pace job that pays. We pay $.15 per envelope, and a batch of 1,000 takes 10-12 hours to write, so we find spending $150 to save 10 hours of work is well worth it.
If you have a printer that can print on envelopes of the size you use, you can use the variable data technique to create envelopes as well. Most word processors even have an envelope template that you can use to do this, but make sure it looks hand written.

Return address labels
We make our own return address labels to save time (and money, if you're paying somebody to write the envelopes). We use a Rollo Thermal Direct Printer and rolls of thermal stickers to print our return address labels at a fraction of a penny per label.

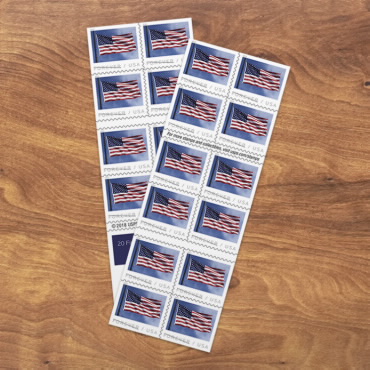
Stamps
It's important that you place stamps on your envelopes by hand, as opposed to using a meter. Use big, attractive, and expensive stamps. Good stamps are another sign that suggests to the recipient that this is a personal letter, not just another solicitation. That will increase your response rate!
Creating a finished product
Now that you have your envelopes, letters, return address stickers, and stamps, all that's left is assembly! If you're using A6 envelopes, you'll fold your letters into fourths and put them into their correct envelopes. Then add your return address and stamp, and you're done! We haven't done it yet, but you can buy a machine that stuffs and seals envelopes. If we get one, we'll update this guide.
That's how we create our custom, personalized direct mail from home! You can outsource as many steps as you'd like (addressing envelopes, stuffing envelopes, stamping, sealing, etc) or do it all yourself. Feel free to experiment with types of envelopes, letter contents, text color, etc. Go the extra mile with quality, and your letters will get opened before your competititor's. Happy mailing!
Some useful tips
Basic direct mail strategy
If the technical details of setting up a mail merge, custom font, and printing your own return address labels seems daunting, there is a simpler way to get a similar result. We did this for a long time, but it's not as autonomous.
Put a piece of plain, white printer paper over your yellow paper. You will need a bright room so you can faintly see the lines beneath. Write your letter with black ink on the plain paper, being mindful of the yellow lines beneath. Leave blank spaces for the owner name and property address.

Place your letter on the scanner on your printer and load the yellow paper into the paper tray. Press copy to print your letter onto the yellow paper.

Now you can make as many copies as you need. These letters look less neat and you will need to individually write in the owner names and addresses, which can be time consuming. However, it does completely bypass the need to create your own font and set up a mail merge. The process for the envelopes is the same, but you can hand-write the return addresses if you don't want to make or buy labels.